Widget Loader API
Easy integration of Comcent Dialer Widget into your web applications
The Widget Loader API provides a simple way to integrate the Comcent Dialer Widget into your web applications. This SDK enables seamless integration with your self-hosted Comcent platform’s dialer functionality.
Complete Integration Example
Section titled “Complete Integration Example”Here’s a complete HTML example showing how to integrate the Comcent Dialer Widget:
<!DOCTYPE html><html lang="en"><head> <meta charset="UTF-8"> <meta name="viewport" content="width=device-width, initial-scale=1.0"> <title>Comcent Dialer Widget Integration</title></head><body> <h1>My Application</h1>
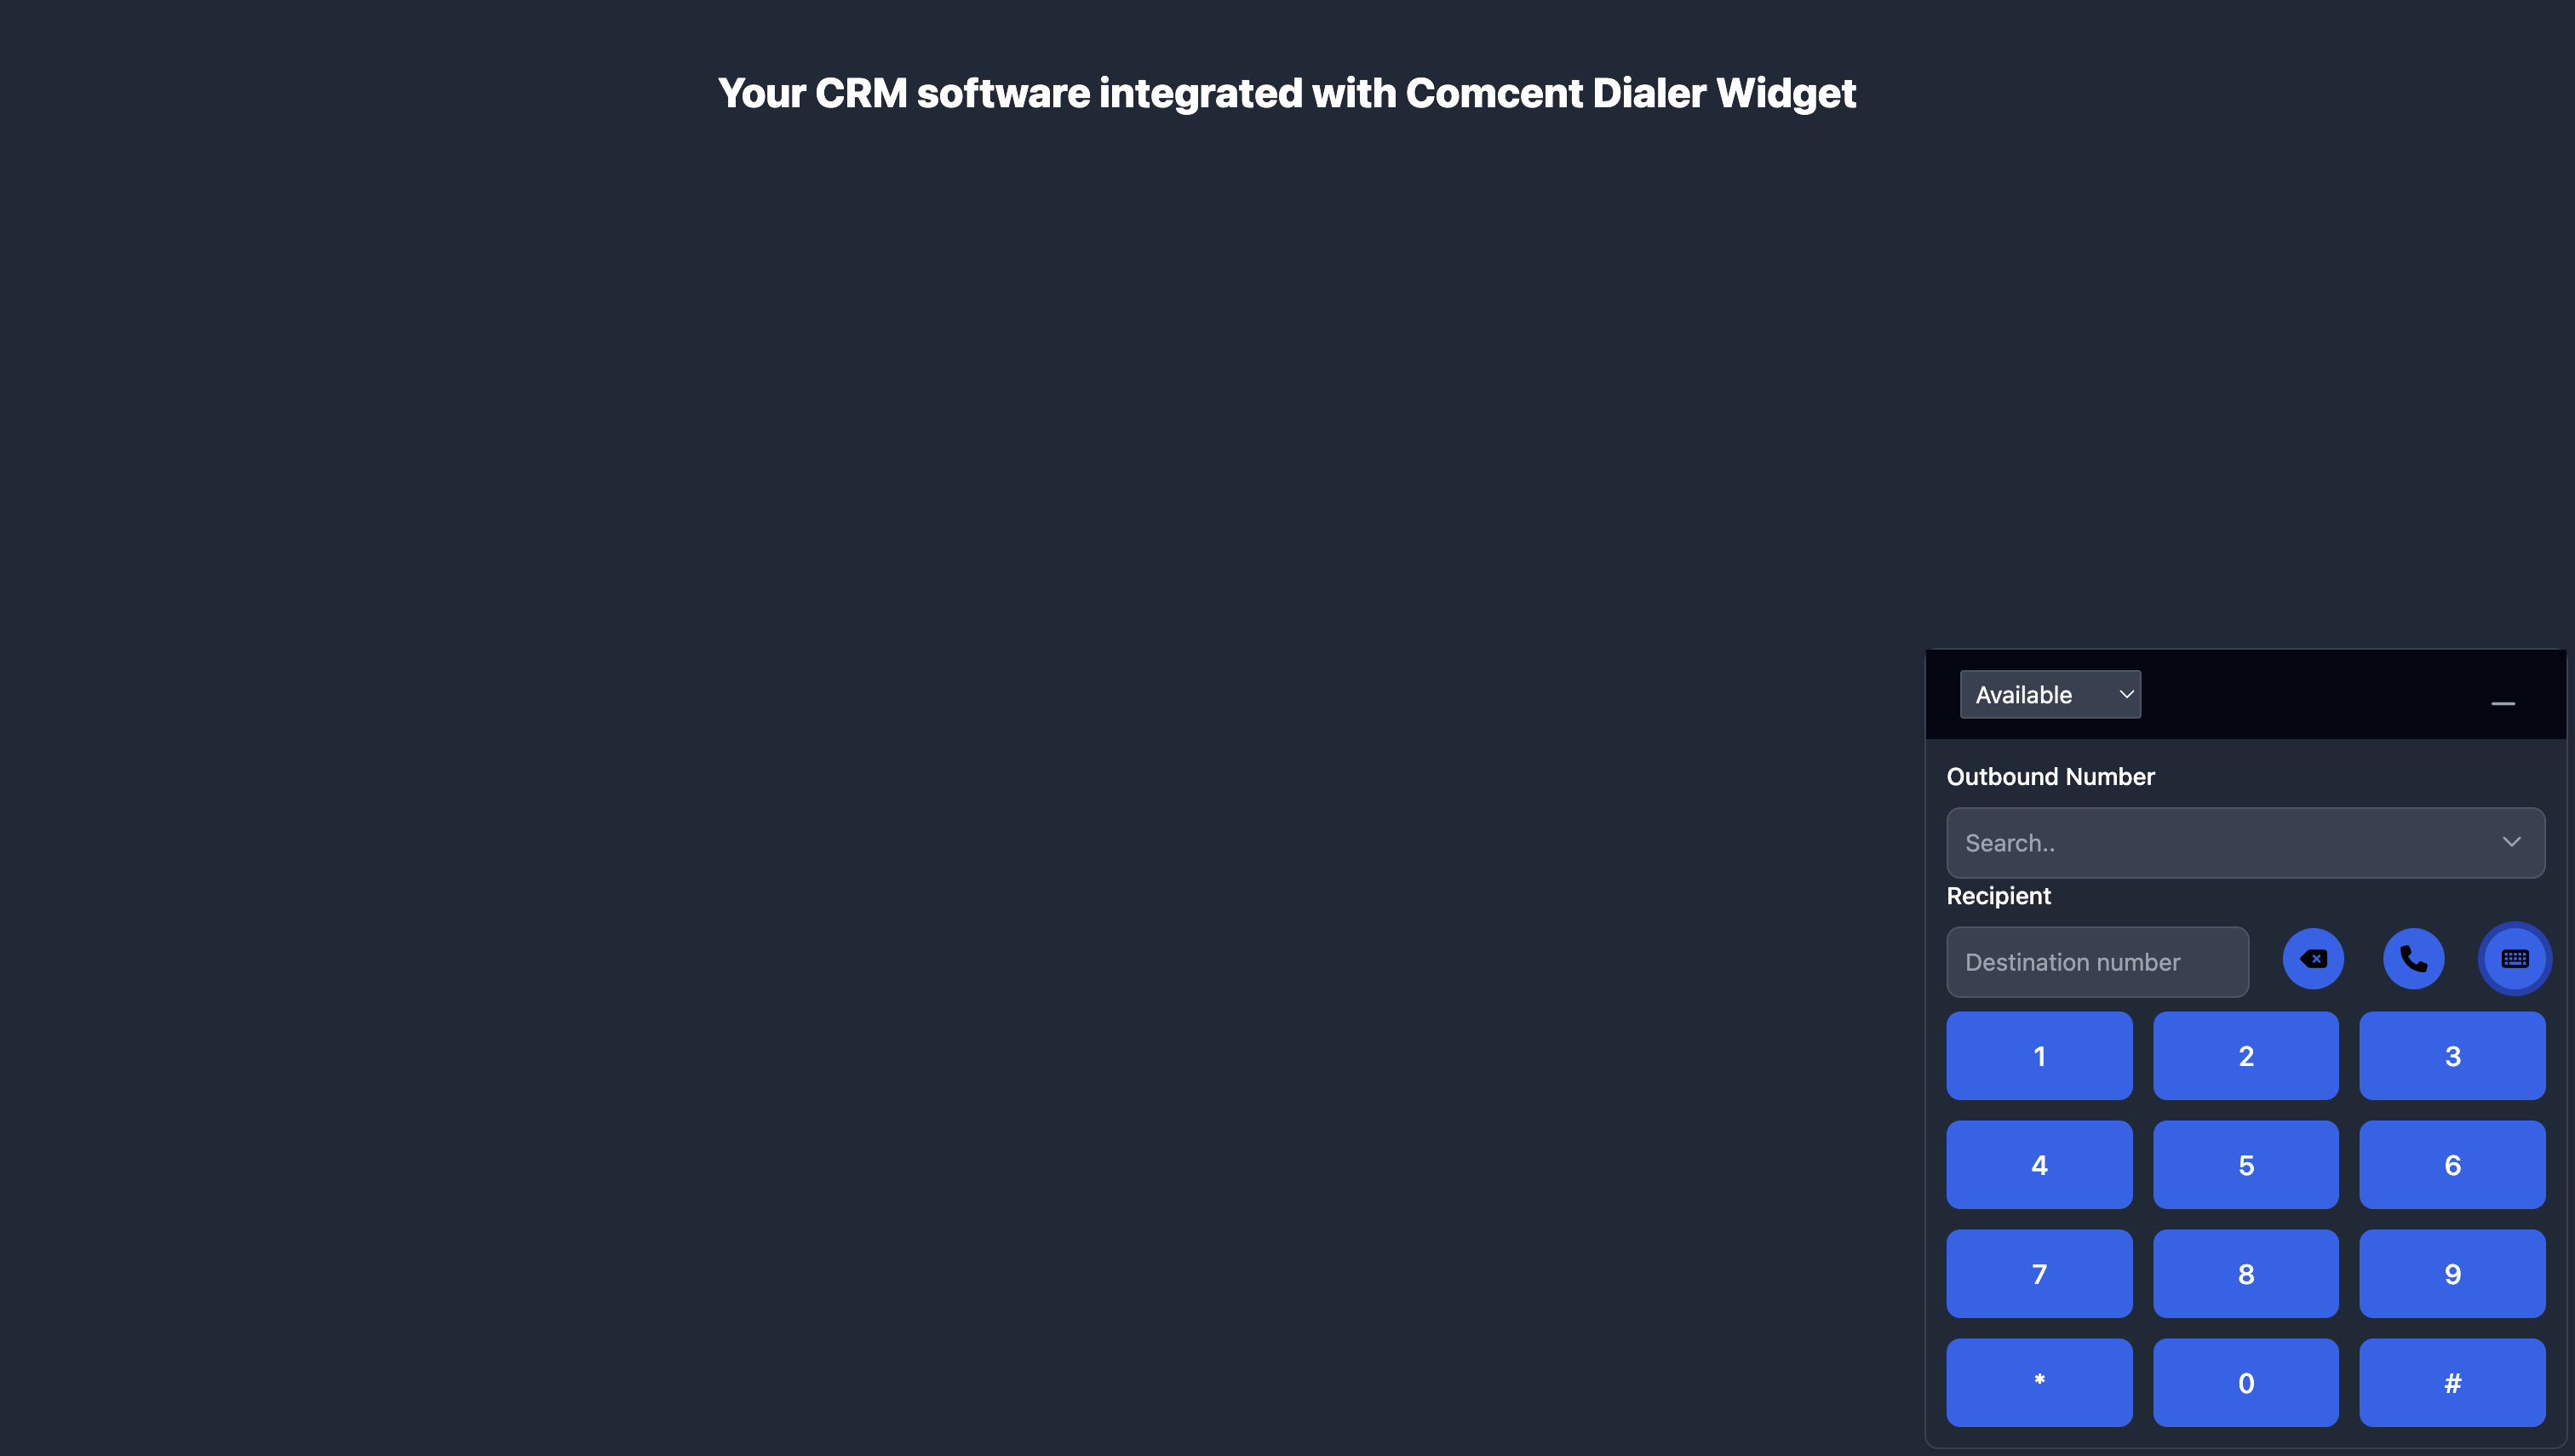
<script> function startWidget() { console.log('startWidget on load') const widget = new window.ComcentDialerWidget({ token: '', delegate: { onCallReceived(data) { console.log('onCallReceived', data) }, onOutboundNumberChanged(outboundAddress) { console.log('onOutboundNumberChanged', outboundAddress) }, onTokenExpired() { console.log('Token expired, refreshing...') // Implement token refresh logic here } } }); widget.load(); } </script> <script src='https://YOUR_COMCENT_HOST/widget/index.js' onload='startWidget()'></script> <link rel='stylesheet' href='https://YOUR_COMCENT_HOST/widget/style.css'></body></html>Below image shows the dialer widget integrated to comcent website
Step-by-Step Explanation
Section titled “Step-by-Step Explanation”Step 1: Include Required Files
Section titled “Step 1: Include Required Files”The widget requires two external files to function properly:
<script src='https://YOUR_COMCENT_HOST/widget/index.js' onload='startWidget()'></script><link rel='stylesheet' href='https://YOUR_COMCENT_HOST/widget/style.css'>- JavaScript file: Contains the widget functionality and API
- CSS file: Provides styling for the widget interface
- onload event: Ensures the widget is initialized only after the script has fully loaded
Step 2: Create Initialization Function
Section titled “Step 2: Create Initialization Function”Define a function that will initialize the widget once the script is loaded:
function startWidget() { console.log('startWidget on load') const widget = new window.ComcentDialerWidget({ token: '', delegate: { onCallReceived(data) { console.log('onCallReceived', data) }, onOutboundNumberChanged(outboundAddress) { console.log('onOutboundNumberChanged', outboundAddress) }, onTokenExpired() { console.log('Token expired, refreshing...') // Implement token refresh logic here } } }); widget.load();}Step 3: Widget Configuration
Section titled “Step 3: Widget Configuration”The widget requires a configuration object with the following parameters:
| Parameter | Type | Required | Description |
|---|---|---|---|
token | string | Yes | Authentication token obtained from the Token-based Authentication API |
delegate | object | No | Object containing callback functions for widget events (optional) |
Getting User Authentication Token
Section titled “Getting User Authentication Token”To use the Comcent Dialer Widget, you need a user authentication token. For detailed information about authentication methods, refer to the Authentication documentation.
Best Practice: Secure Token Flow
To ensure security, never expose your organization API key in browser-side code. Instead, implement a secure flow where your server acts as an intermediary:
┌─────────────┐ (1) Request Token ┌─────────────┐ (2) Get User Token ┌─────────────┐│ Browser │ ──────────────────────► │ Your Server │ ──────────────────────► │ Comcent ││ │ │ │ │ API ││ │ ◄────────────────────── │ │ ◄────────────────────── │ ││ │ (4) Return Token │ │ (3) Return Token │ │└─────────────┘ └─────────────┘ └─────────────┘This flow ensures your organization API key remains secure on your server while providing the necessary user token to the widget.
Server-Side Implementation
Section titled “Server-Side Implementation”Create an endpoint on your server to securely fetch user tokens:
// Your server endpoint (e.g., /api/get-user-token)app.get('/api/get-user-token', async (req, res) => {    try {        const userEmail = req.query.email; // Get from authenticated session
        // Make request to Comcent API using your org API key        const response = await fetch(            `https://api.comcent.io/api/orgs/your-org/user-token?email=${userEmail}`,            {                headers: {                    'Content-Type': 'application/json',                    'X-API-Key': process.env.COMCENT_ORG_API_KEY // Keep secure on server                }            }        );
        const data = await response.json();        res.json({ token: data.token });    } catch (error) {        res.status(500).json({ error: 'Failed to get user token' });    }});
Client-Side Implementation
Section titled “Client-Side Implementation”Update your widget initialization to fetch the token from your server:
async function startWidget() {    try {        // Get token from your server        const response = await fetch('/api/get-user-token?email=user@example.com');        const { token } = await response.json();
        // Initialize widget with the token        const widget = new window.ComcentDialerWidget({            token: token,            delegate: {                onCallReceived(data) {                    console.log('onCallReceived', data)                },                onOutboundNumberChanged(outboundAddress) {                    console.log('onOutboundNumberChanged', outboundAddress)                },                onTokenExpired() {                    console.log('Token expired, refreshing...')                    const response = await fetch('/api/get-user-token?email=user@example.com');                    const { token } = await response.json();                    widget.token = token;                }            }        });        widget.load();    } catch (error) {        console.error('Failed to initialize widget:', error);    }}
Delegate Methods
Section titled “Delegate Methods”The delegate object (optional) handles widget events through callback methods:
| Method | Parameters | Description |
|---|---|---|
onCallReceived | Triggered when an incoming call is received | |
onOutboundNumberChanged | Triggered when the outbound number is changed | |
onTokenExpired | - | Triggered when the authentication token expires |
Type definitions for the callback parameters:
Address
Section titled “Address”interface Address { name: string; // Display name of the contact or number address: string; // Phone number or SIP address (e.g., "+1234567890" or "sip:user@domain.com")}CallReceivedData
Section titled “CallReceivedData”interface CallReceivedData { from: Address; // Information about the caller (name and phone number) to: Address; // Information about the called party (name and phone number) paths: { // Array of routing paths the call took type: string; // Type of path (e.g., "sip", "pstn", "internal") address: string; // Address of the path (e.g., SIP URI or phone number) name: string; // Display name for the path }[];}DialerWidgetDelegate
Section titled “DialerWidgetDelegate”interface DialerWidgetDelegate { onCallReceived?: (data: CallReceivedData) => void; // Called when an incoming call is received onOutboundNumberChanged?: (outboundAddress: Address) => void; // Called when user changes the outbound number onTokenExpired?: () => void; // Called when the authentication token expires}Need Help?
Section titled “Need Help?”For additional support or questions about the Widget Loader, please contact our support team.